Countdown guide
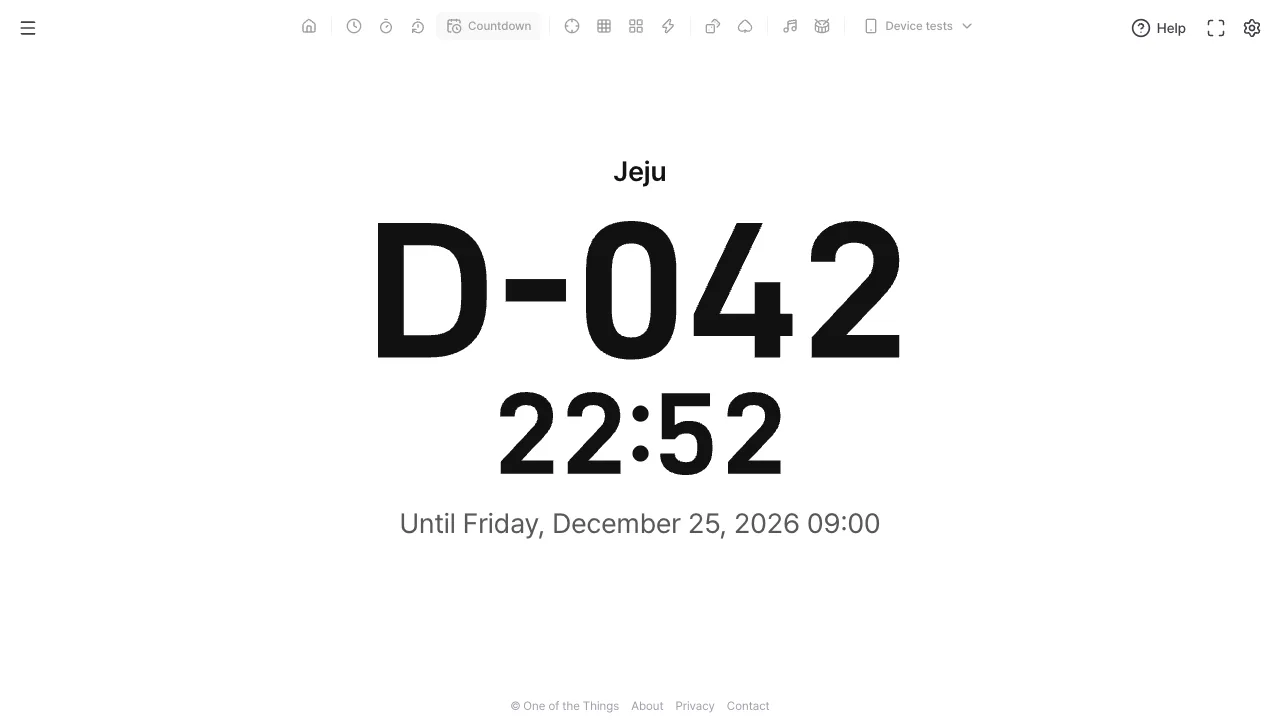
The One of the Things Countdown shows, in big digits, how many days are left until a date, whether that day is today, and how many days have passed. It gives you a day line (D-042) and a time line (22:52) separately, and a calendar view lets you count the days left at a glance. This guide walks you through setting a target, changing the view and look, keeping it on screen, and saving the countdowns you use often.
Getting started
There is nothing to install or sign up for. If you open it without choosing a target, it counts down to the next New Year.
- Open the menu with the menu button at the top left and tap 'Countdown'. On a wide screen you can also tap it right in the tool list at the top.
- At first the target is the next New Year, and the top line reads 'New Year'.
- Press the settings button to open the settings panel and choose a 'Date' in the 'Target' group. Pressing the T key opens a window with the same fields.
- There are no start or stop buttons. Once open, it keeps running like a clock. Tapping the digits does nothing, so it is safe to leave standing on a wall or desk.
How to read the screen
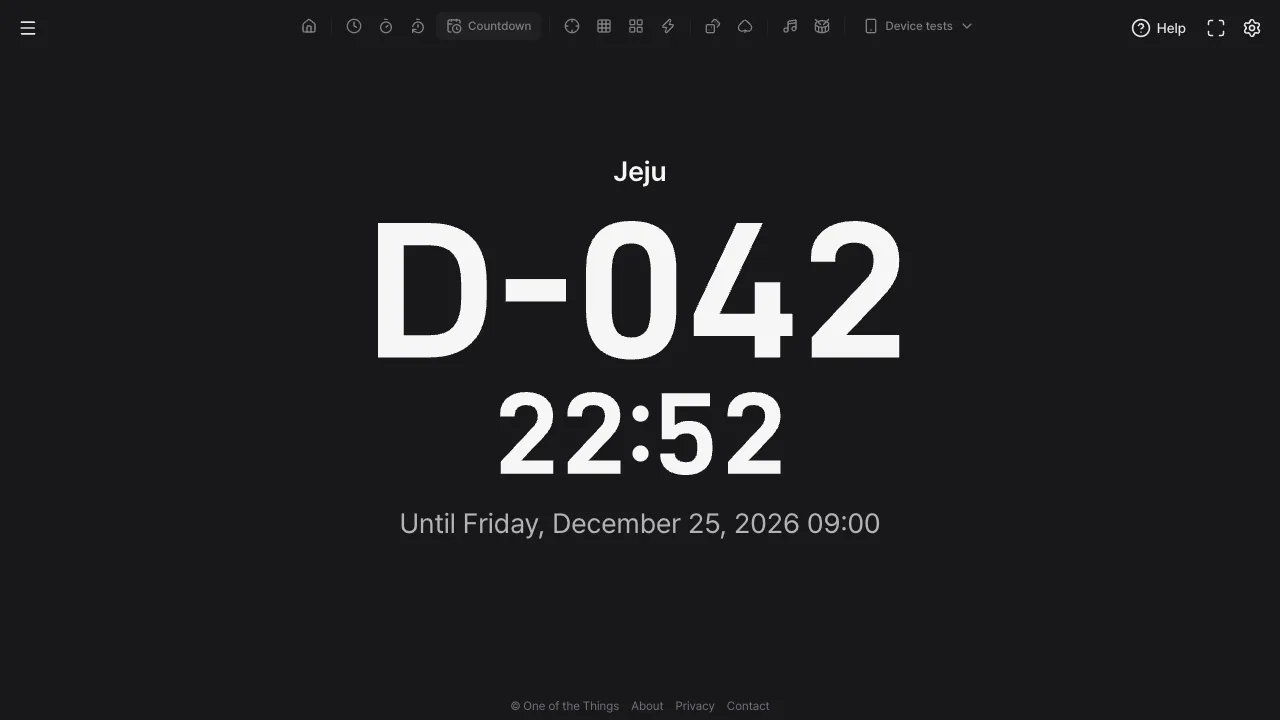
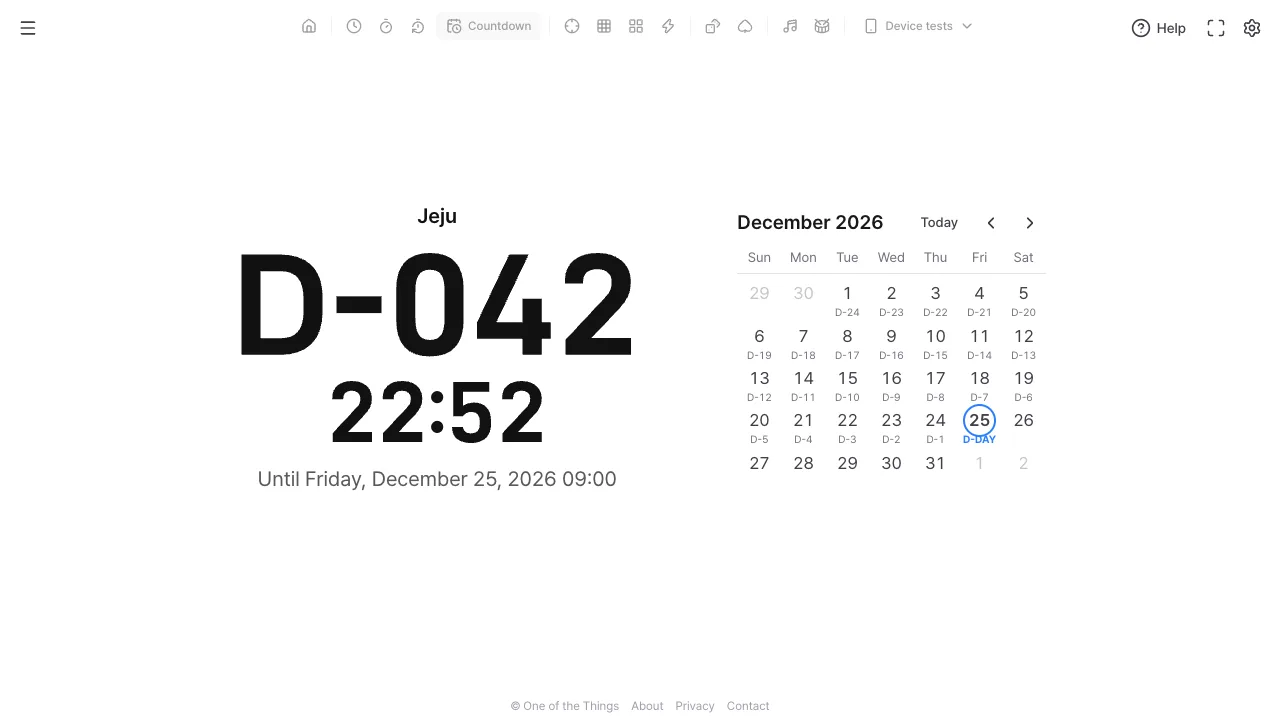
From the top, the screen has a name line, a day line, a time line and a target line. Having days and time separate may feel odd at first, but a few rules make it easy to read.
- Day line: the number of calendar days from today to the target date. If today is November 13 and the target is December 25, it reads D-042. On the target day it reads D-DAY all day, and from the next day it counts the days gone as D+001, D+002. The number changes at midnight, whatever the target time is.
- Time line: the part of the time left that is less than a day, as hours:minutes:seconds. If 41 days 22 hours 51 minutes 18 seconds are left, it reads 22:51:18. With a date-only target (midnight), it is the time until midnight tonight, which is also when the day line changes.
- Last 24 hours: when the target time comes within a day, the time line grows and becomes the main line.
- At the target time: for one minute the time line blinks at 00:00:00. If reduced motion is on in your system, it stays still instead. After that, the time since the target counts up.
- Target line: shows the target date and time in one line. It ends with 'Until …' before the target time and 'Since …' from then on.
- Name line: shows the name you set. With the default target and no name it reads 'New Year'; for any other target without a name, there is no line.
Setting a target
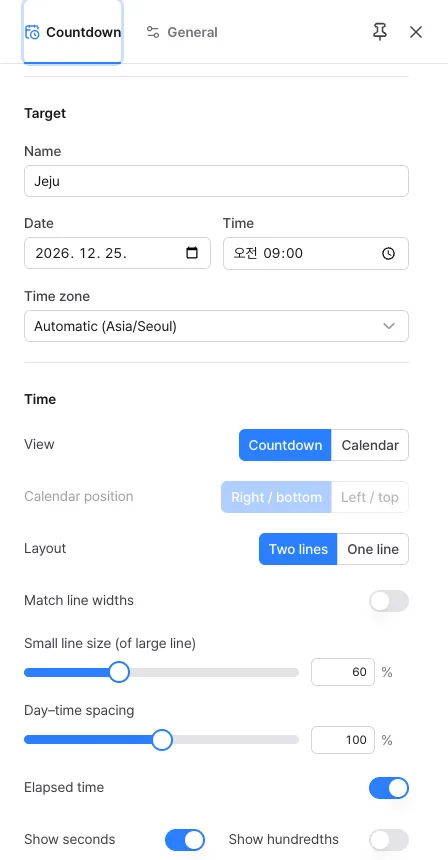
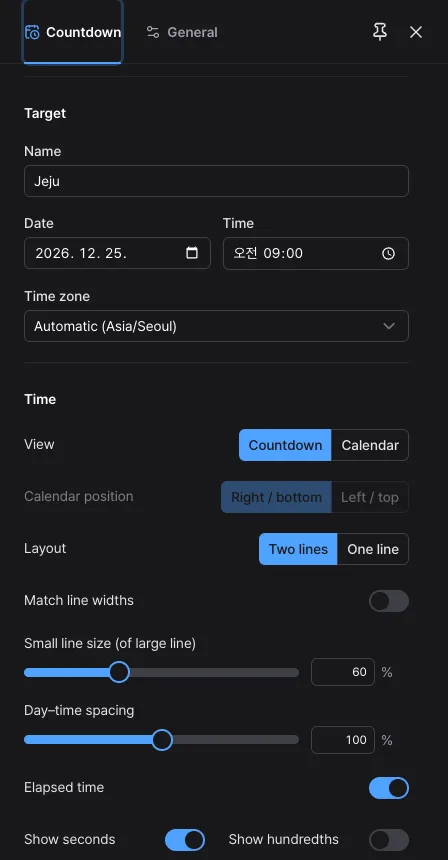
You set the target in the 'Target' group of the settings panel. The window opened with the T key edits the same fields.
- Type a 'Name' of up to 20 characters, for example Summer trip. If you leave it blank, the name line does not appear.
- Choose a 'Date'. If you leave it blank it is the next New Year, and on January 1 it reads D-DAY all day. Dates from 1900 to 2199 can be chosen.
- Choose a 'Time'. The default is 00:00 (the start of the day). If you enter an exact time such as the start of an exam, the time line reaches zero at that time.
- Choose a 'Time zone'. The default is Automatic (your device's time zone). For a meeting or event abroad, pick that city's time zone yourself.
- When you use the target window, press 'Apply' for the change to take effect. This keeps the screen from jumping while you are still choosing.
Countdown and calendar view
There are two views. Countdown uses the screen for the biggest possible digits, good for reading from far away, while Calendar is better for counting the days left and making plans.
- Where to switch: in the settings panel, use 'View' at the top of the 'Time' group to choose 'Countdown' or 'Calendar'. The C key also switches.
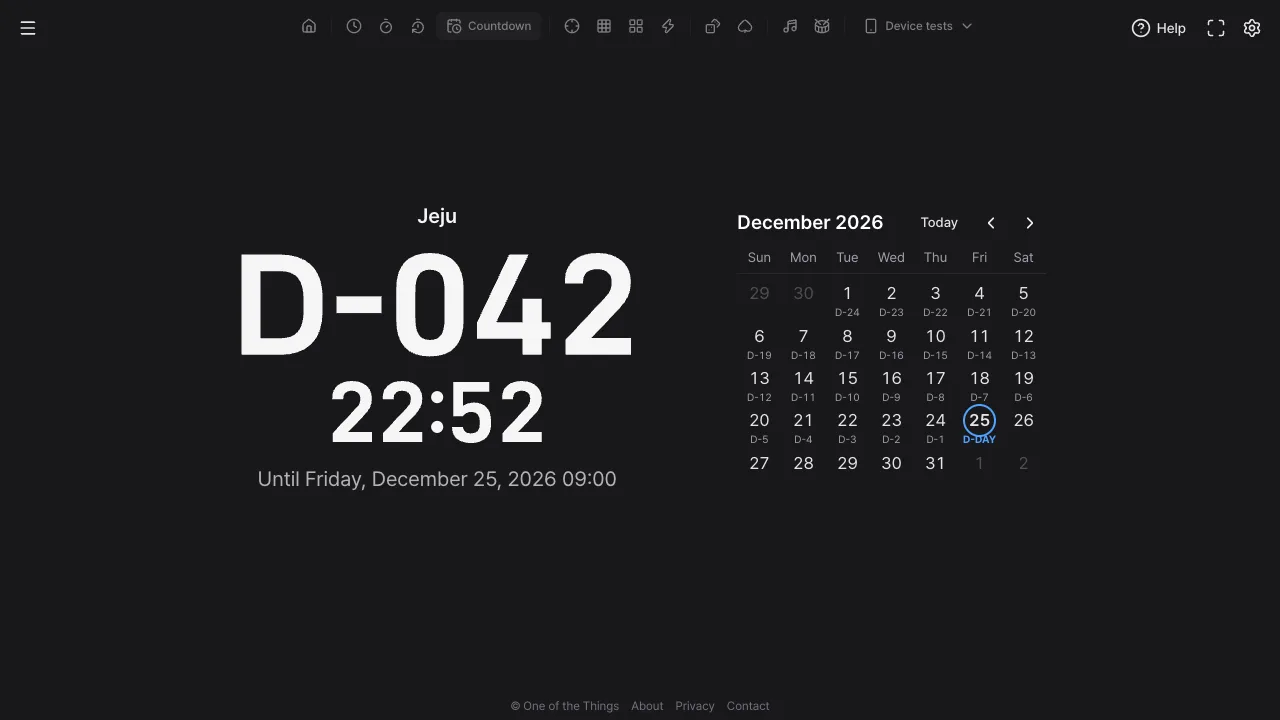
- Calendar view: the digits and a one-month calendar sit side by side (stacked on a tall screen). Each day shows its own D-number, today is marked with a fill, and the target day gets a circle and a bold D-DAY.
- Changing month: use the 'Previous month' and 'Next month' buttons above the calendar, and the 'Today' button to return to the month that contains today. The month you move to is not remembered, so refreshing or moving the target to another month brings you back to the starting month.
- Calendar position: under 'Calendar position', choose whether the calendar sits 'Right / bottom' or 'Left / top'. It is only available in calendar view.
- The calendar stays after the target has passed. It opens on the month that contains today, and the days from the target day to today show D-DAY and D+ numbers.
Changing the time line and layout
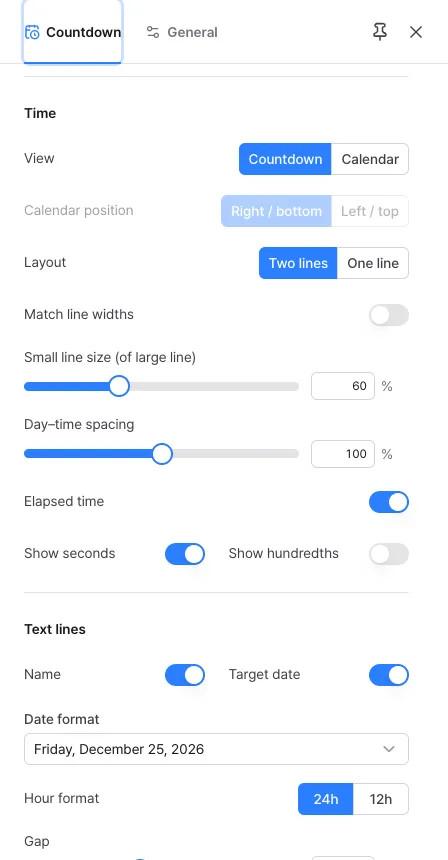
In the 'Time' group of the settings panel you decide how the day line and the time line are arranged.
- Layout: 'Two lines' (default) puts the time line under the day line. 'One line' suits very wide screens. Calendar view always uses two lines.
- Match line widths: when on, both lines get the same width and look like one block. While it is on, 'Small line size (of large line)' is not used.
- Small line size (of large line): the size of the small line relative to the large one (40–100%, default 60%).
- Day–time spacing: adjusts the gap between the two lines from 0 to 200% of the default.
- Elapsed time: when off, the time line disappears from the target time on and only the day line is left. On the target day D-DAY grows, and at the next midnight it moves to D+001.
- Show seconds and Show hundredths: hiding seconds leaves only hours and minutes. Hundredths can be turned on only while seconds are shown, and are not available in the Flip style.
Changing text lines and look
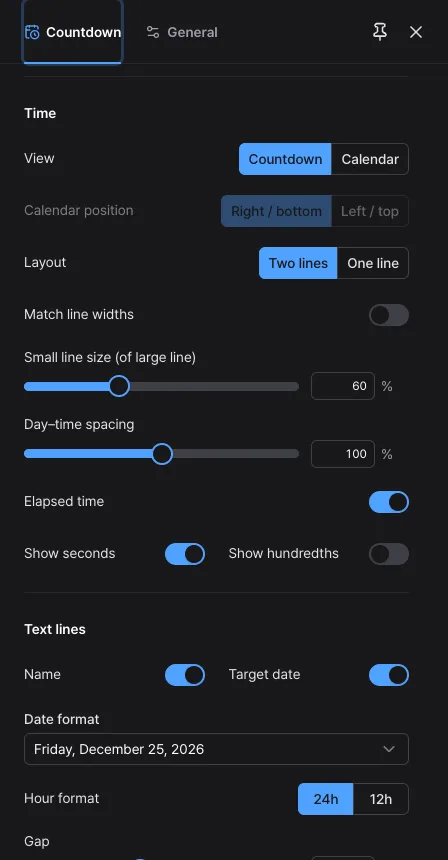
The name line and target line are set in the 'Text lines' group, the look of the digits in the 'Display' group, and the backdrop in the 'Background' group. The choices are the same as the clock's.
- Name and Target date: turn the two text lines on and off separately. With both off, only the digits are left.
- Date format and Hour format: choose the date in the target line from four formats, long to short, and the time as 24-hour or 12-hour. If the target line is wider than the digits, it automatically switches to a shorter format.
- Style: six choices, Plain, LED, LCD, Dot (round), Dot (square) and Flip. The D, A and Y of D-DAY are drawn in the same style.
- Color, font and size: pick a color and a font, and set the size from 25 to 100%. The day, time and text lines grow and shrink together as one block. On a touch screen you can also spread two fingers to enlarge.
- Background: pick 'App theme', Black, Graphite, Navy, Forest, Cream, Sky or Baby pink, or set your own color with 'Custom'.
Keeping it on
A countdown is often left on a desk or wall for a long time. These features help.
- Screen on: if 'Screen on' at the top of the settings panel is on, the screen will not switch off while you watch the countdown. Because of browser rules, you may need to tap the screen once for it to take effect.
- Full screen: hides the menu and buttons and shows only the countdown. On browsers without full screen, such as Safari on iPhone, use 'Add to Home Screen' to open it without the address bar (see 'Help' in the menu).
- Burn-in protection: off at first. Turn on 'Burn-in protection' in the settings panel and the digits alternate between two non-overlapping spots at the interval you set (10 minutes at first), so the screen does not get marked. It works only in countdown view and rests in calendar view.
- Center in the browser window: on a computer, if the address bar and tabs make it look low, turn this on to center it in the whole window.
- Without internet: once opened, it keeps running on your device's clock. A connection is needed only when you open the page again.
Saving the countdowns you use
Settings are not saved every time you change them, so a refresh brings you back to the starting settings (the next New Year, unless you have used 'Set default'). Keep the countdowns you check often as presets. One preset is one countdown.
- Set the target, view and look the way you want, then tap 'Save as preset'. If you leave the name blank, it gets an easy name made from the name and the target date. Up to 12 can be saved.
- After that, choose it from the box and that countdown opens. Choosing it also puts the settings in the address, so you can bookmark it.
- Use 'Manage' to rename, overwrite or delete, and send the same countdown to someone with 'Copy link' or 'QR code'.
- To always open with the same settings, tap 'Set default'.
Ideas for using it
A few ways to use the countdown, with settings that suit each one.
- Counting down to an exam: put the exam name in the name and the start of the exam in the date and time. Show it large in countdown view on a tablet next to your desk.
- Trips and vacations: use calendar view to see the days left and the weekdays together while you plan.
- Birthdays and anniversaries: make several presets and send them to family as links.
- Event or presentation day: in the last 24 hours the time line grows. In full screen it can be read from far away.
- Appointments abroad: choose that city's time zone and it counts to the same moment wherever you open it.
- Counting days since something started: set the start day as the target, and that day is D-DAY and the next day is D+001. The first day is not counted as day 1, so keep that in mind.
Frequently asked questions
- Adding the day line and the time line seems to give an extra day.
- The day line counts calendar dates, and the time line is the part of the time left that is less than a day. If it is 20:13:13 now and the target is 08:40 in seven days, you see D-007 and 12:26:47, while about 6 days 12 hours are really left. Read the two lines separately instead of adding them.
- The target goes back to New Year when I refresh.
- By design, settings are not saved every time you change them. Tap 'Save as preset' or 'Set default' under 'Presets' in the settings panel and it will open with that target next time. You can also bookmark the address after choosing a preset.
- The number changed before the target time.
- The day line counts calendar dates rather than the target time, so it changes at midnight. If the target is tomorrow at 3 PM, today reads D-001 all day, and it changes to D-DAY at midnight, when tomorrow begins. The time line counts down separately to the target time.
- Do I get an alert at the target time?
- No. There is no sound or browser notification; the time line blinks at 00:00:00 for one minute from the target time. You have to be looking at the screen to notice.
- Does it count to the same moment if I open it in another country?
- If the target has a 'Time zone' you chose yourself, it counts to the same moment wherever you open it. With 'Automatic' it follows the device you open it on, so a link is read in the time zone of the person who receives it.
- Where does my information go?
- There is no sign-up, and only the settings you saved with 'Set default' and your presets are stored, in this device's browser alone. The countdown does not send dates or settings to any server. If you share a preset as a link, the target and its name are written into the address, so keep personal details out of the name. See the Privacy Policy for details.
Try it out right away. You can always return to the original settings with 'Reset settings' in the settings panel.
Other guides
- Clock guide
- Timer guide
- Stopwatch guide
- Target Time guide
- Number Recall guide
- Sequence Recall guide
- Reaction Time guide
- Random number guide
- Card Flip guide
- Metronome guide
- Rhythm guide
- Touchscreen Test guide
- Multi-touch Test guide
- Dead Pixel Test guide
- Refresh Rate Test guide
- Gyroscope Test guide
- Accelerometer Test guide